Crisis Track User's Guide:
Mobile App
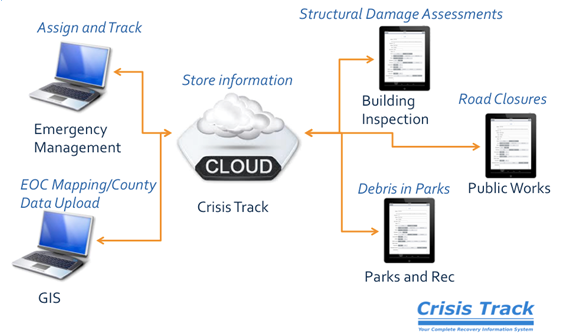
Crisis TrackTM helps an organization conduct damage assessments and process FEMA grant applications to more quickly and more efficiently get recovery dollars into your community. The Crisis Track system combines Software-as-a-Service applications with mobile applications to allow you to manage various assessment teams in real time.
Crisis Track works on both phones and tablets running the iOS, Android, or Windows 10 operating systems. The app can be downloaded from iTunes, Google Play, or Windows App Store.
Once you've managed your incidents using the administration and incident console, this guide will help you collect data in the field using the mobile app.
If you have any questions, issues, or feedback, please contact support@crisistrack.com
Mobile App
As a mobile app user you will be a member of a team ("DA Team 1," etc.), your team will be assigned tasks ("Willowbrook Neighborhood," etc.) and inside of tasks will be entries (Structures in need of assessment, road closures, etc.).
Start with the Login section to begin.
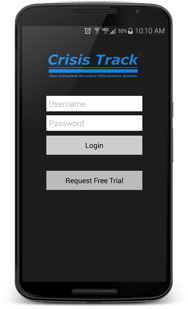
Login
Your administrator will provide you with a username and password. If you already have access to The Crisis Track Console, you can log into any mobile app using the same credentials.
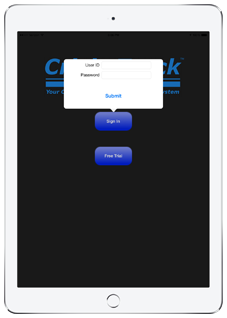
You've logged into The Crisis Track Mobile App.
Choose an Incident
The next step after logging in is to choose on which Incident you will be working. Tap the Incident to which you've been assigned.
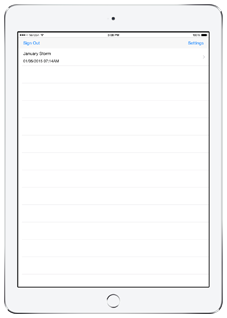

You can also choose to edit settings or logout. These options are located at the top of your screen On the Android Mobile App they are located inside of the menu.
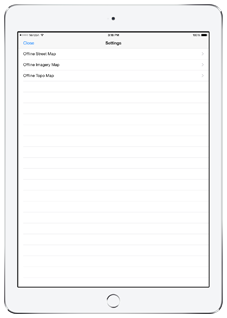
The settings menu allows you to save maps for offline use. If you expect that you be without internet connectivity, but will need to use a map of an area use this function. Choose which type of map you would like to be able to view (Street, Satellite or Topo). If you would like to download a map for the entire area within your boundary, click on the Standard download button. Due to technical limitations, Crisis Track can only download 100,000 map tiles, so the standard download will download map tiles for the entire area, but not zoomed in fully. If you need the map to zoom in more, then click on the Advanced select button. This will show a screen where you can specify the area and scale to download the offline map. Click on the Draw button. Tap on the map to draw the polygon around the area. Click on Save when the polygon is complete. Use the + and - buttons to zoom the map to the level that you would like to download. Click on Download when you are satisfied with the area and scale. Now, when viewing a map somewhere in the app the area you've saved will be available even if other areas can't load.

Select Collect Data
After choosing an incident, click the Collect Data button. This will initiate the team and task selection process so that you can collect data that has been assigned to you.


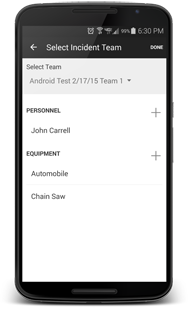
Choose Your Team
Next you will choose the team to which you belong. You may belong to more than one team so be sure to know for which team you should currently be working as your team will dictate to which tasks you have access.
Choose a Task
After choosing a team your next step is to choose the task you will begin working. Tasks contain entries which may be structures requiring assessment, road closures that need to be documented or other activities. Tasks will likely be logically created to encompass an area or type of work to be done.
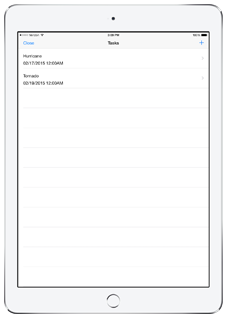
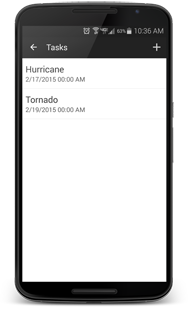
If you need to create a new, blank task, then you can do so by tapping the hamburger button (three horizontal lines) in the top right corner of your device. For most users your tasks have already been created.
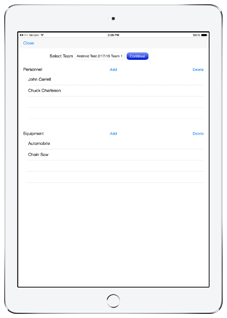
Once you select a task, you will see a screen with start, stop, and view buttons. Along the bottom panel, you will see Personnel and Equipment tabs. Here you can edit who is assigned to the team, as well as what equipment is assigned to the team.
Clock In
Once you've chosen a task and made any necessary changes to your personnel and equipment lists, it's time to clock in.
Note: This is a method to track hours that personnel and equipment that were activated as part of a recovery effort.

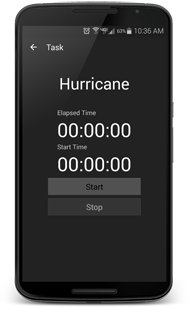
Clicking the Start button will begin tracking time for your team, the equipment assigned to that team and GPS tracking of your device. When back on this screen you should tap Stop to clock out after finishing work for that task. If you will be working on a different task you will clock in to that task in the same way.
Clicking Start or Continue (if you're on this screen but already clocked in) will send you to the next screen.
If you would prefer to view the Entries in the task without starting time and GPS tracking, click on View.
Exploring a Task
You've chosen an incident, picked your team and clocked into a task. Great job! Here's where the real work begins...
There are several things to do inside of a Task. The various screens are accessed by tapping one of the three tabs on the bottom of the screen. The first screen you will see is the list view of the entries.
Task: Entries
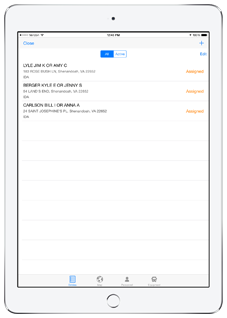
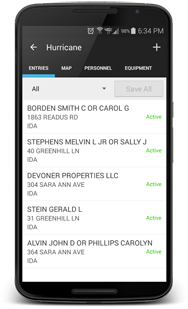
The Entries tab displays a scrollable list of all the entries assigned to this task.
Tapping the + button allows you to create a blank entry using any of the forms that have been enabled by your administrator.
You can filter which entries are displayed using the menu above the list of entries.
If the Save All button is enabled that means one or more of your entries are saved locally. Once you're in a location with reliable signal, either from Cellular or WiFi connectivity, tap Save All to synchronize all of your changes for this task with the Web Console.
Clicking any of the Entries in the list will take you to that entry's details. See Exploring an Entry for more information.
Task: Map
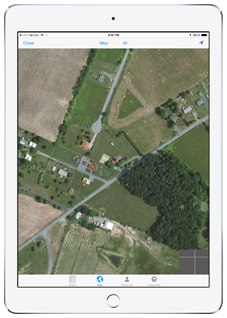
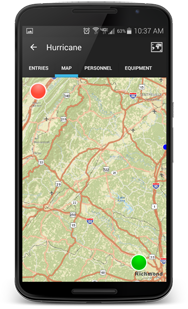
The Map tab displays the entries assigned to this task on a map. You can drag the map and zoom in/out using normal "pinch" actions.
Clicking on a dot will display a popup with the name and address for that entry. Clicking the encircled i will take you to that entry's details. See Exploring an Entry for more information.
Clicking the map button in the top panel will allow you to change the base map type from the default Street to Satellite or Topo.
Exploring an Entry
Clicking an Entry inside of a task using either the list view or the map view reveals the details of that entry.
There are several things to do inside of an Entry. The various screens are accessed by tapping one of the three tabs. The first tab you will see is the form. Be sure to visit the Submit tab to save any changes.
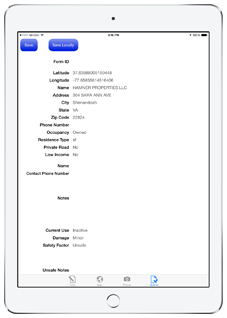
Entry: Form
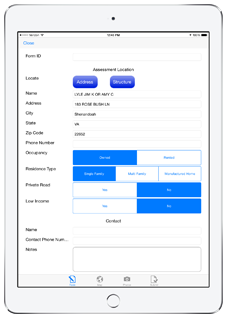
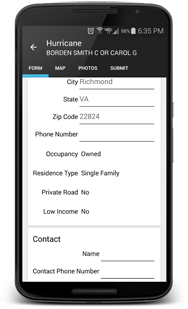
The Form tab displays the fields for the form chosen for this type of entry.
The appearance of the form depends on the type of entry you are viewing. There are several types of forms available.
Fill in the details of the form. Some information may be pre-populated by data from the Crisis Track system, such as address.
Entry: Map
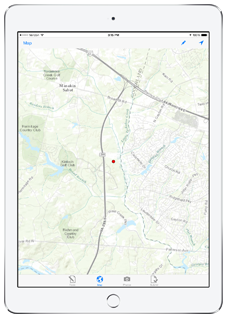
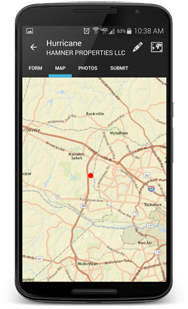
The Map tab displays the location of this entry as a red dot. This can help you to understand its physical location when in the field. You can drag the map and zoom in/out using normal "pinch" actions.
If the location of the entry is incorrect or missing, it can be set by clicking on the pencil button, and then clicking on the correct location on the map. Clicking the pencil button a second time will save the location.
Entry: Photos
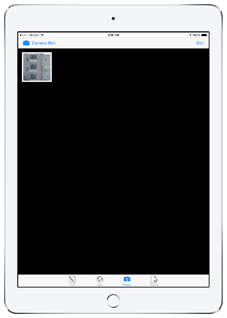
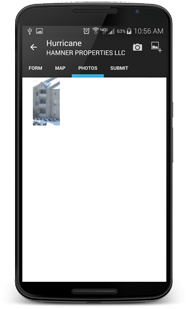
The Photos tab allows you to take photos related to this entry in order to document your assessment.
Note: as the app loads photos previously taken, it may take a few seconds to appear.
Tapping the camera icon takes you to your device's camera function. Take a photo as you normally would and tap OK to use the photo you've taken or Retry to take a different picture.
Tapping the "Camera Roll" icon takes you to your device's photo storage. From there you can choose a photo to upload to the entry.
Entry: Submit
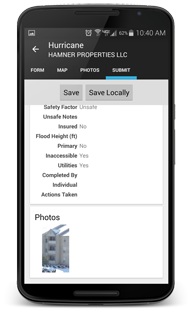
The Submit tab summarizes the entry. It shows you the data entered into the form and the photos attached.
If anything needs to be corrected do so using the tabs.
If there is currently either cell or Wifi connectivity you can click the Save/Upload button to sync.
You can click the Save Locally button to save any entry to the device. Later, when in the presence of connectivity access the mobile app again and either click Save inside of an individual entry or click Save All on the Task List View Screen to sync new data.
Clock Out
Once you've completed assessing all of the entries in your task, close out of the entries list and click Stop to clock out.